Writing a Check for a Business Payment: A Step-by-Step Guide
Writing a check for a business payment is a simple and effective way to make financial transactions. It's trackable, secure, and looks professional. However, it requires attention to detail and a clear understanding of the process. In this guide, we'll walk you through the key components and steps involved in writing a business check.
What is a Business Check?
A business check is a pre-printed payment document drawn against funds held in a company's bank account designated for business-related transactions. It's a formal, auditable financial transaction that requires precision. Maintaining accuracy when writing a check is paramount for legal compliance and ensuring a clear, traceable record of all business expenditures.
Components of a Business Check
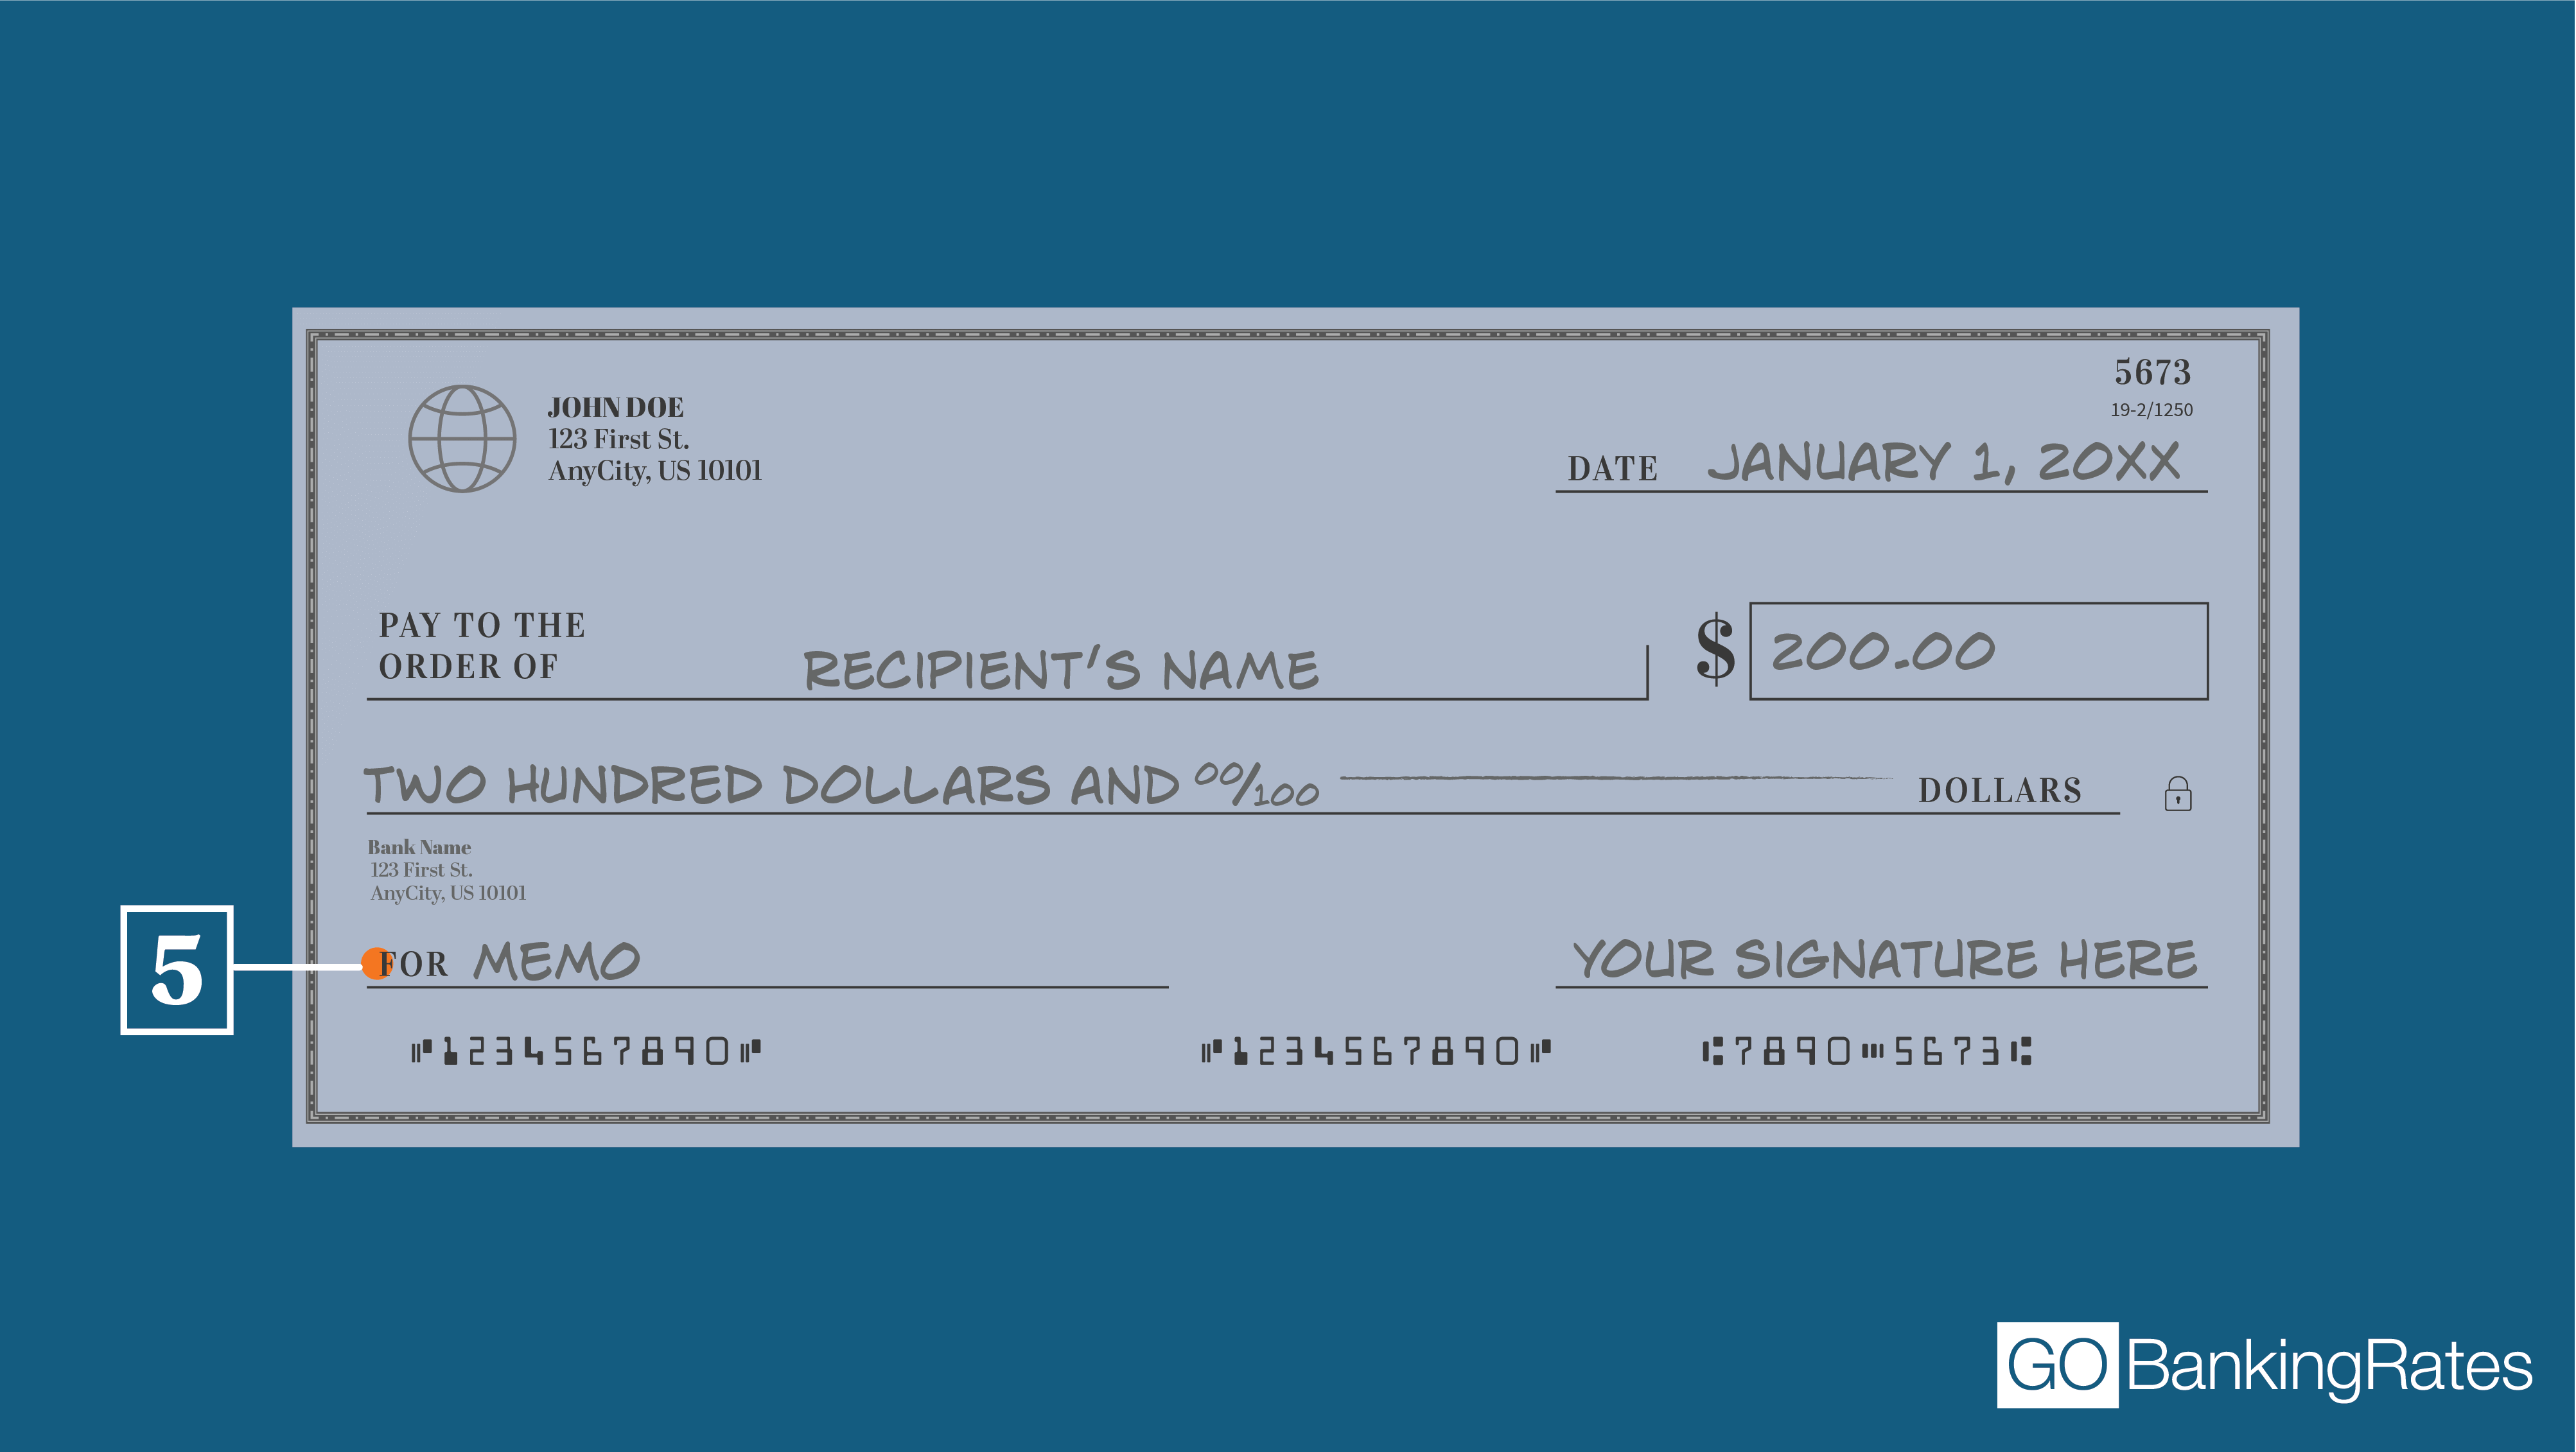
A business check consists of several key components:
- Date: The date the check is written.
- Payee: The person or business receiving the payment.
- Payee's Address: The address of the payee.
- Dollar Amount: The amount of the payment, including the dollar sign and cents.
- Treasury Check Number: A unique number assigned to the check.
- Routing Transit Number (RTN): The bank's routing number.
- Account Number: The business's account number.
- Signature: The business owner's signature.
Moving forward, it's essential to keep these visual contexts in mind when discussing Writing A Check For A Business Payment.
How to Write a Business Check: Step-by-Step Guide
Here's a step-by-step guide on how to write a business check:
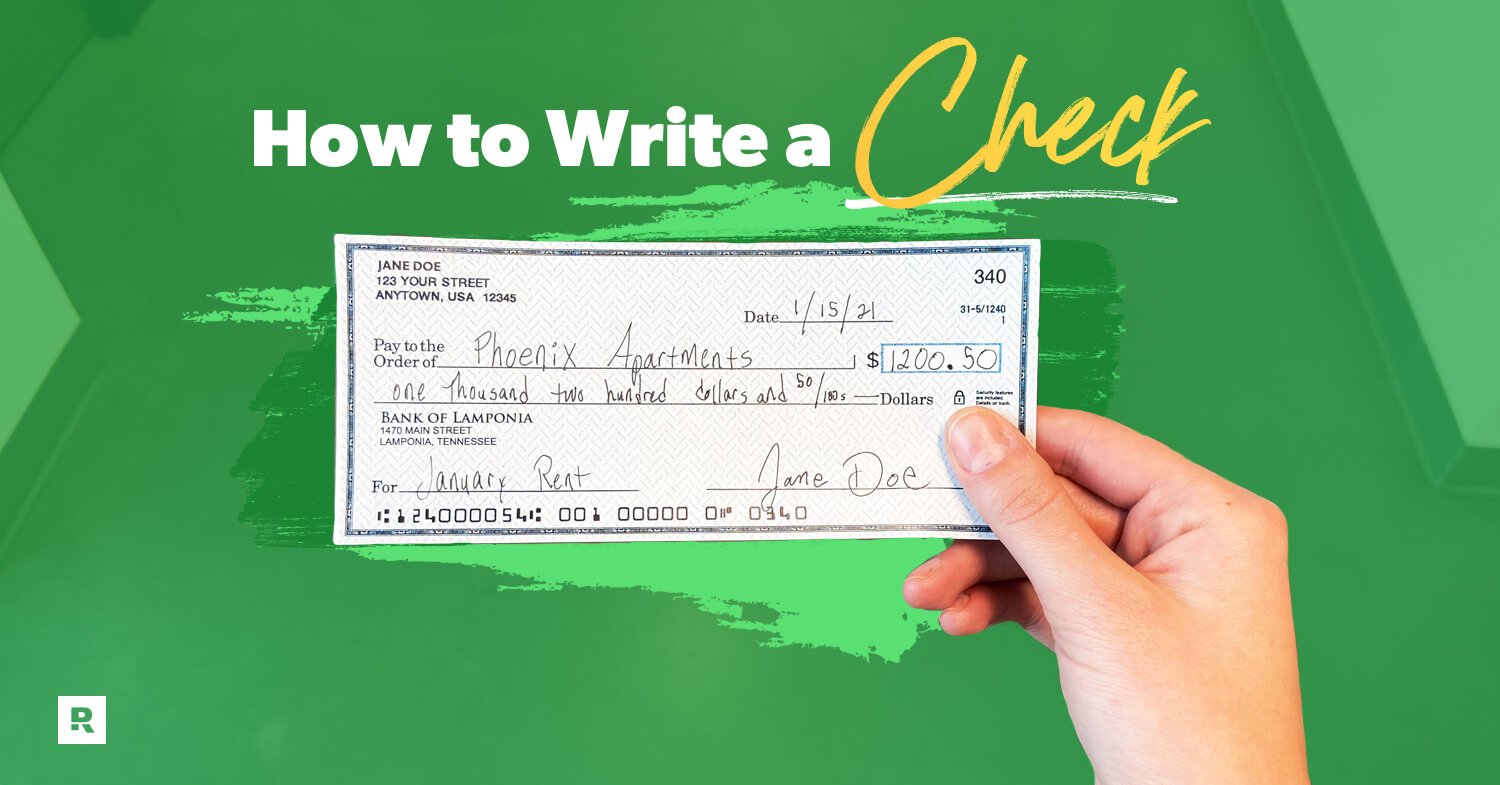
Step 1: Date
Write the date in the top right-hand corner of the check. This date should be the same as the date you're writing the check.
Step 2: Payee
Write the payee's name on the "Pay to the Order of" line. This line is usually located on the left-hand side of the check.
As we can see from the illustration, Writing A Check For A Business Payment has many fascinating aspects to explore.
Step 3: Payee's Address
Write the payee's address below the payee's name. This line is usually located on the left-hand side of the check.
Step 4: Dollar Amount
Write the dollar amount in numerical form on the bottom right-hand corner of the check. This amount should match the amount written in words on the line above it.
Step 6: Signature
Sign the check with your business owner's signature. This signature should match the one on file with the bank.

This particular example perfectly highlights why Writing A Check For A Business Payment is so captivating.
Tips and Reminders
Here are some tips and reminders to keep in mind when writing a business check:
- Use a pen when writing a check. Pencils can be erased, which can lead to errors.
- Write all the information clearly on the check to ensure proper payment is made.
- Keep a record of the payment, including the check number, date, and amount.
- Verify the payee's information to ensure the check is sent to the correct person or business.
- Double-check the math to ensure the correct amount is being paid.
Conclusion
Writing a check for a business payment is a simple and effective way to make financial transactions. By following the steps outlined in this guide and paying attention to detail, you can ensure that your checks are written correctly and efficiently. Remember to always verify the payee's information and double-check the math to ensure accurate payments.
Additional Resources
For more information on writing a check for a business payment, you may want to check out the following resources:
- Bank of America's Guide to Writing a Check
- Capital One's Guide to Writing a Check
- Extra Value Checks' Guide to Writing a Check

 - wikiHow")


![View of How to Write a Business Check [Quick & Simple Guide]](https://images.template.net/123604/payroll-check-template-10zd7.jpeg "How to Write a Business Check [Quick & Simple Guide]")


